How to Add Files to a GitHub Repo You Don’t Own
Date Published: 03 May 2019

There are a bunch of GitHub (and other git host) repositories that aren’t really for software projects, but rather are for documentation or other resources. For example, the ASP.NET Core docs, or various awesome lists, or the slides and materials from conferences like Stir Trek. Frequently, even as a non-developer, you may want to contribute to such repositories, maybe even just as simply as to add a file or perhaps update a text file in your browser.
Unfortunately, GitHub doesn’t make it extremely easy to discover how to do this if you don’t already know the process and various jargon terms that are involved like “forking” and “pull request” so this post will demonstrate what’s required to simply add a file to a GitHub repo you don’t already own.
Updating a File
If all you need to do is update an existing file, that’s actually pretty easy. Most GitHub repositories have a README.md file in their root. I’m going to use a repo that I’m not an owner of as an example – in this case AutoMapper.
Let’s say I want to add a link to the home page. Well, this page is displaying the contents of README.me, so I first need to click on that file. Note that you must be logged in for this to work.
Once you’ve clicked on the README.md file, you should see a pencil icon in the top right. Mousing over it reveals:
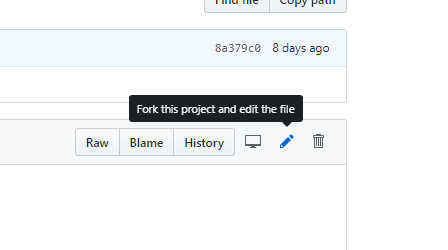
Click to fork the project and edit the file.
Go ahead and click the icon. You’ll be presented with a text editor view of the file, which uses markdown formatting. Scroll to the bottom – you should see your GitHub icon and a title and description for your change.
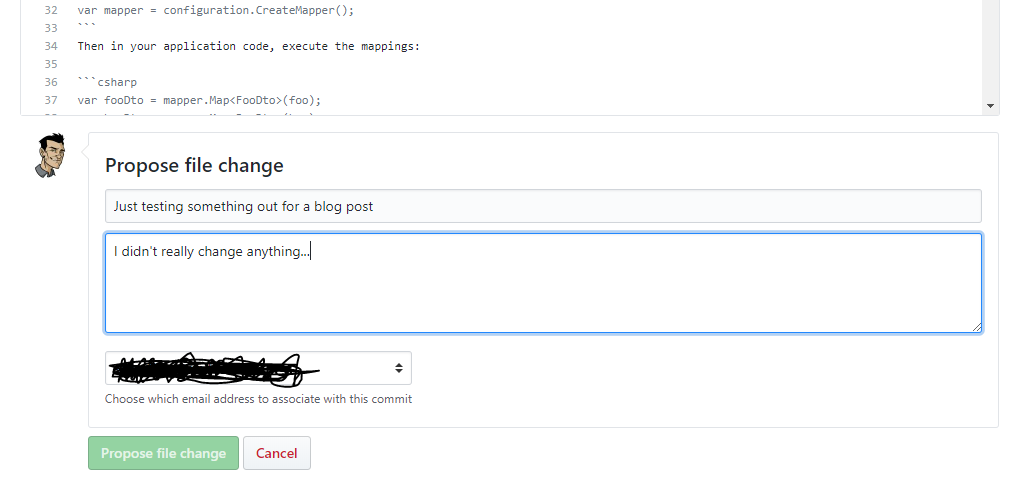
Updating a file on a repo you don’t own.
Once you click Propose file change, a pull request will be created and the owner of the repository will have a chance to review your change and either accept it, reject it, or discuss it with you.
Forks and Pull Requests
Two terms you should know are forks/forking and pull requests.
A fork of a project is a copy of the original at that point in time. If the original repository continues to be updated, the fork won’t see these updates (at least, not automatically). You can use a fork of a project as a kind of backup, since it copies the repo to your account.
Forking is also used for collaboration. You can modify your copy of the original, and then submit your changes to the original repo. When you follow this process, your changes aren’t automatically pushed back to the original repo. Instead, you have to request that the owner of the original pull your changes into their repo. Hence the term, pull request.
Pull requests compare any two branches. You can make pull requests within a repo or between a fork and its parent repo. A common mistake to watch out for, though, is to make a pull request from a branch and then continue working on that branch. Any additional changes you make in that branch will also become part of that pull request! Thus, it’s best to create a new branch for any particular change, and to keep pull requests small and focused.
Adding Files to Repos You Don’t Own
Ok, now you’ve seen how to edit a file and you hopefully have at least some idea of what forks and pull requests are. So how do you add a new file to a repo you don’t own?
I’m going to return to Automapper again for this example. When I view the main page of the repo, I see this:
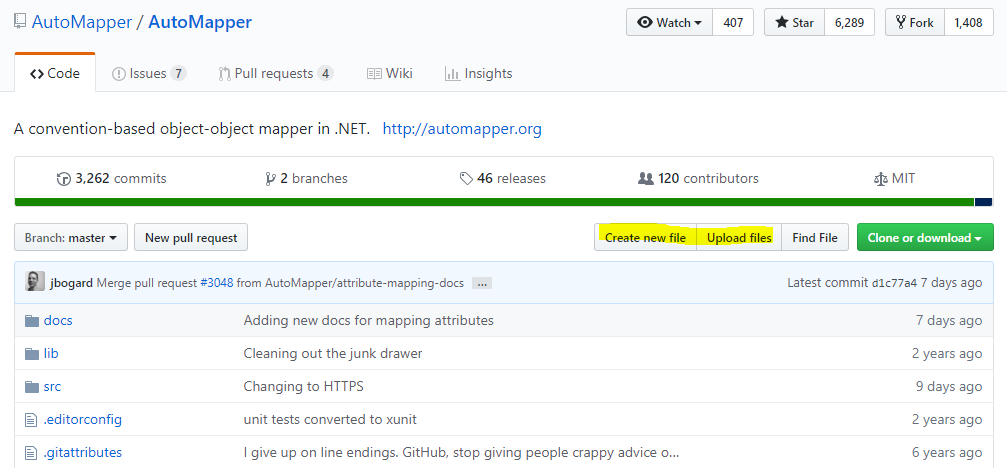
Note buttons for Create new file and Upload files…
GitHub exposes functionality to let me create a new file. If I click that button, I’ll get the same experience as if I edited a file, with the one addition being that I can specify a file name. This might be fine for some scenarios, but won’t help me if I’m trying to add a PowerPoint or ZIP file to the site.
Now, if I click Upload files, I get this helpful dialog:
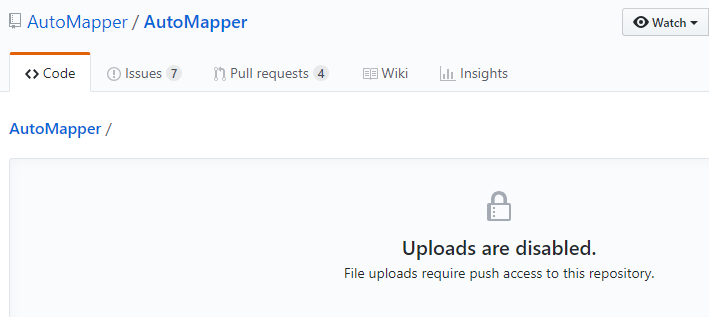
Shouldn’t the button have been grayed out?
The GitHub repository says Uploads are disabled. File uploads require push access to this repository. This sounds like you’re stuck, but you’re not. You just need to use a pull request.
Note: Even if your experienced with GitHub, it’s easy to mess up the next step. You need to remember to Fork the repository before you Clone it. There’s nothing to prevent you from Cloning the repo you don’t own, but without a Fork it’s much harder for you to contribute to it.
At the very top of the screen, click on the Fork button. It’s not bright and green, and it will have some number next to it representing how many people have forked this repository in the past.
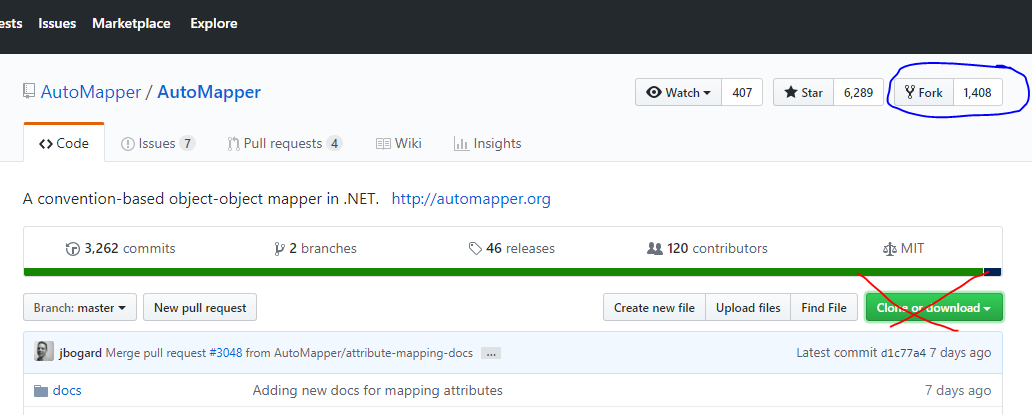
Fork, don’t Clone, at this point.
Now that you’ve forked the repo, you should see something like this (but with your account name instead of ‘ardalis’):
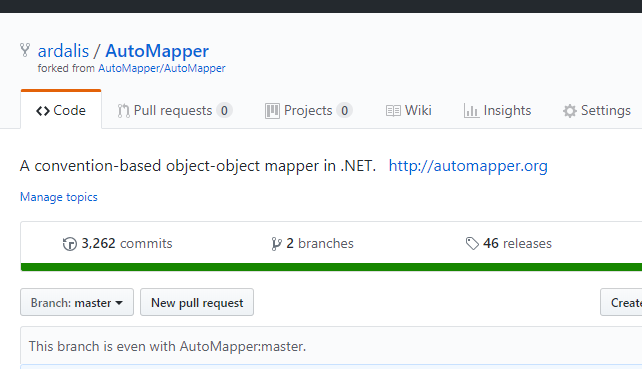
Note the small text stating where the repo is forked from
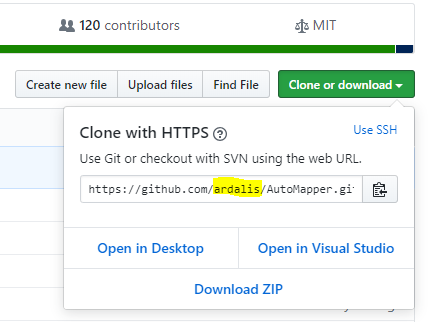
Now we’re ready for that big green buttonon the right that says Clone or download. Click that, and choose Clone. Copy the URL (you can also just grab the repo’s URL from the status bar). Make sure it has your username or organization name in it, not the original one.
We’re going to download the GitHub repo to our local computer. Open a command or terminal window and go to a folder where you want to copy the files. I typically have a folder like C:\dev\scratch for things I’m going to download once but don’t plan on keeping around long term. Note that you need to have Git installed for this next step.
Enter the following into the terminal window once you've navigated to the proper folder:
git clone https://github.com/ardalis/AutoMapper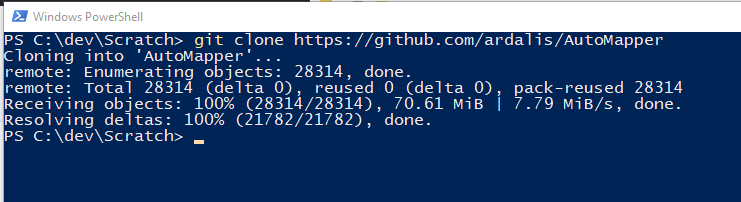
Now we have a copy of our fork of the repo on our machine.
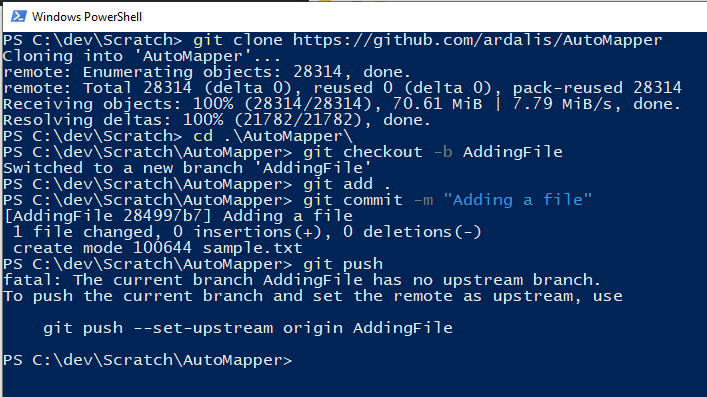
Now you have a copy of the repo (your fork of the original) locally. Open it up in Windows Explorer (Finder on mac) and add the file you want to upload to the appropriate folder. Once you’re done, go back to your console/terminal window and run these commands:
cd .\AutoMapper\

git checkout -b AddingFile

git add .

git commit -m "Adding a file"

git push
Change the first line to be the actual folder where the repo is.
These commands will create and check out a new branch, then add any pending changes to the current set of things to check in. You should see it add the file you added. The next line checks in (“commits”) the change locally, just on your machine. And the last command will push the change to GitHub. Usually if this is the first time you’re doing this, you’ll need to add one more command:
Almost there!
Fortunately it tells you the exact command to run. Do it and you should be all set. What you’re doing is telling it to create a matching branch on GitHub called ‘AddingFile’ and to use that as the place you’re going to push your changes to. After running that command you should see this:
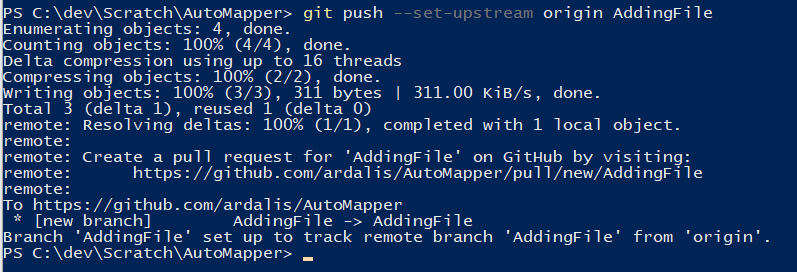
Our changes are on GitHub! Only one more step!
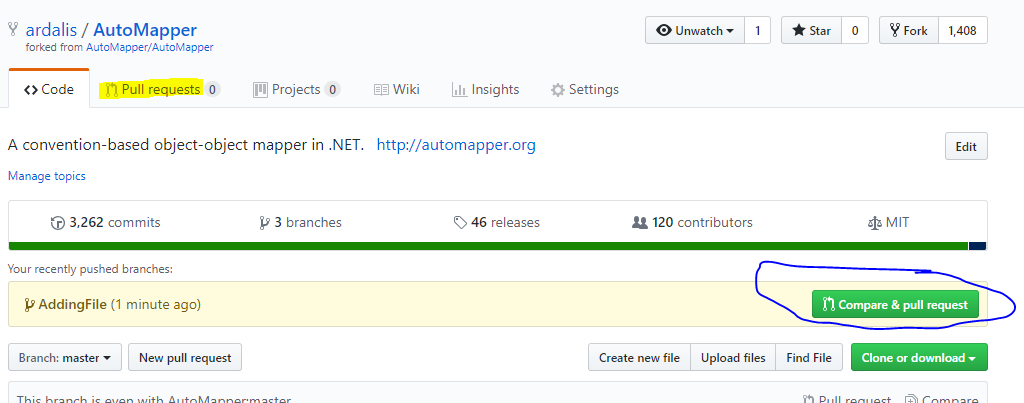
Now go back to your fork of the repo in the browser. GitHub should helpfully offer to let you create a pull request right from the home page, but if not, go to the Pull requests tab.
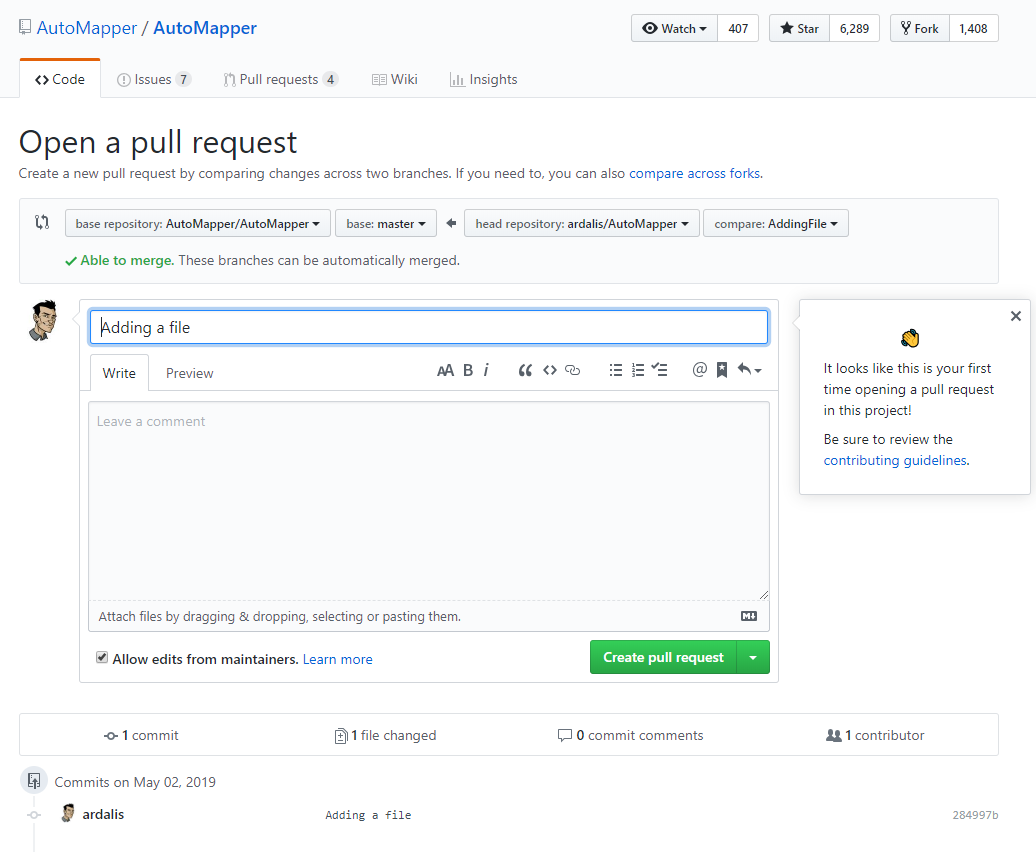
Now just fill out the form and click Create pull request when you’re done!
The owner(s) of the original repository will be notified and they’ll review your file change and decide whether or not to accept it. If they have questions or comments, they’ll appear in the pull request and you should get notifications if you’ve enabled them. In any case, check the pull request URL to see its status.
If this helped you, please leave a comment or consider sharing this tweet to maximize reach:
How to Add Files to a GitHub Repo You Don't Ownhttps://t.co/lqW1TLZQBJ#git #github #programming #community #opensource #gitlab #dev #devdiscuss #devcommunity
— Steve "ardalis" Smith (@ardalis) May 3, 2019
Thanks!

About Ardalis
Software Architect
Steve is an experienced software architect and trainer, focusing on code quality and Domain-Driven Design with .NET.