Add HTTPS To Any Site For Free
Date Published: 06 March 2019
Back in the old days, adding HTTPS/SSL/TLS to secure a web site was a big deal. You had to spend hundreds of dollars for a certificate, then install it on the web server. It had to be specific to the subdomain you were using, or you had to shell out even more bucks for the wildcard cert. And they’d expire sometimes, and your site would go down, and that was never fun.
Times have changed. Yes, you can still do things the old way, and there are some advantages to doing so. But HTTPS is expected now. Google actively penalizes sites that don’t support it. Browsers are quick to tell you about “Not Secure” sites you visit. And for good reason – automated hacking is more prevalent than ever and various attacks take advantage of insecure communication channels between browsers and web servers.
So, if you have a smaller site, like a blog, that you want to secure but you haven’t because it’s traditionally been a huge hassle and some expense to support HTTPS, you’re going to love CloudFlare. Note, I don’t work for CloudFlare and they’ve never paid me a dime (for that matter, I don’t believe I’ve ever paid them anything, either). I’m just a fan of their free services and think you might benefit from them.
I have a podcast, WeeklyDevTips.com. It’s hosted by Simplecast, and I’m pretty happy with their service. One thing they don’t support for technical reasons, though, is HTTPS for custom domains (like weeklydevtips.com). You see, their certificate is for their domain, not mine. They also don’t provide a way for me to use my own cert, so for a while I thought I was stuck, just hoping some day they’d offer some kind of support
But then I remembered CloudFlare, which I’m already using for several other sites. CloudFlare provides HTTPS to any domain for free, and it literally only takes a few minutes to set up. Let me show you.
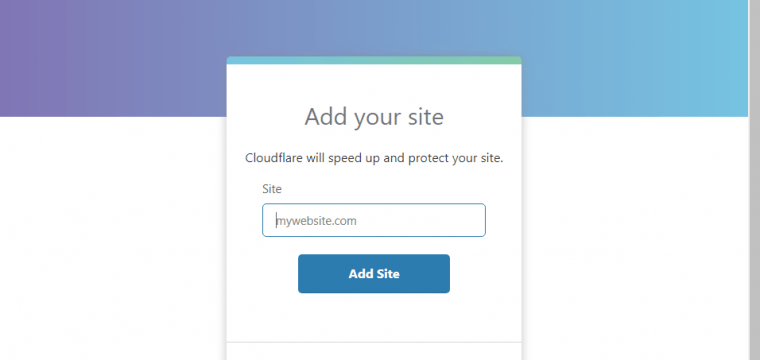
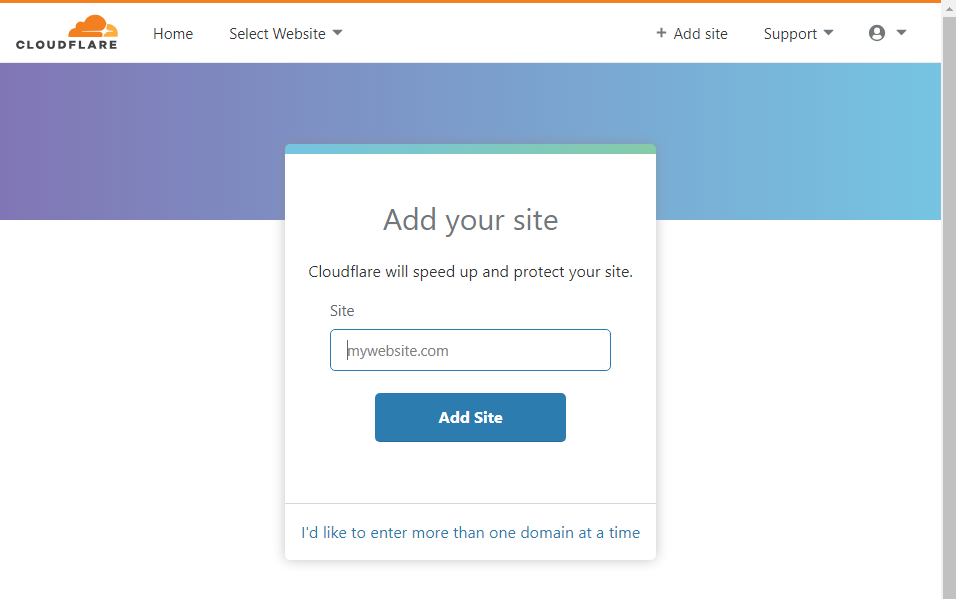
First, create a CloudFlare account. Then click on Add Site. You just need the domain.
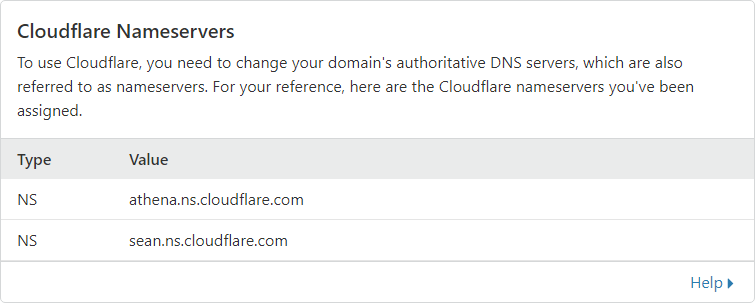
Next it will scan your DNS entries and confirm to you it found them all. Go to your current DNS host and verify they look correct, then update your DNS to use the DNS servers CloudFlare recommends:
Once this is done, there may be some delay while DNS shifts from your current DNS servers to CloudFlare’s. This could take anywhere from no time to a few days, depending on where traffic is coming from and how entries have been cached. Usually it’s pretty quick.
Secure Your Website
This next step is the important one. Click on the Crypto menu icon and make sure SSL is turned on for your domain.
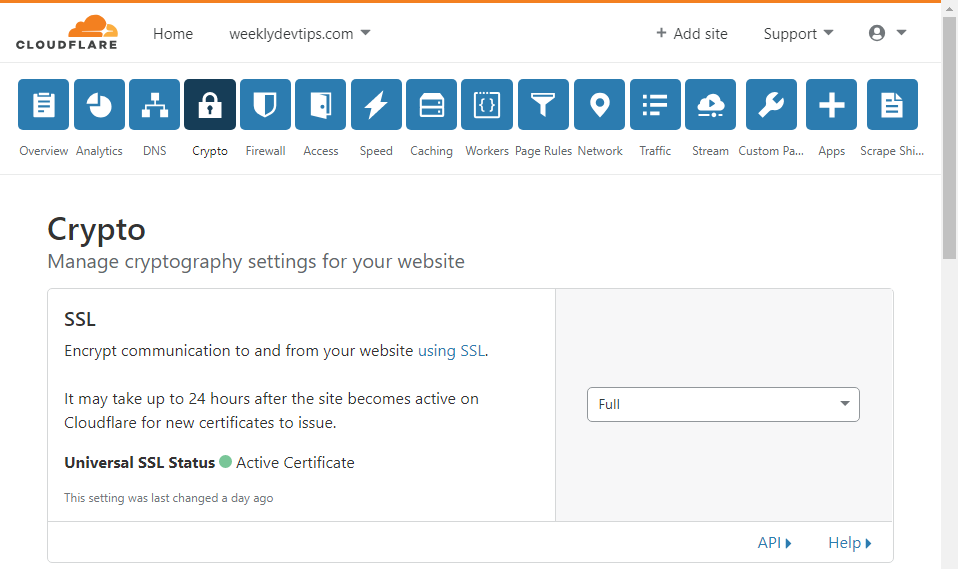
I recommend also enabling the option Always Use HTTPS.
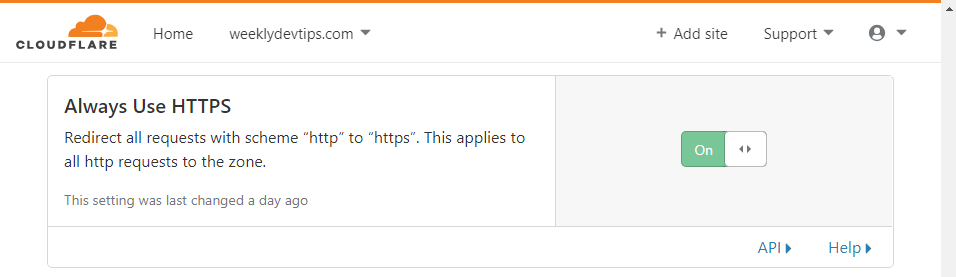
Boom. All your traffic is secure.
With these in place, you may be done. However, in some cases you’ll also need to add a page redirect to make sure www/no-www works correctly. For that, you can jump to the (still free!) Page Rules icon. I’m normally not a fan of using “www.” prefixes on web sites since it’s not the 20th century any more, nobody talks about the “world wide web”, and everybody knows shorter domains and URLs are better than longer ones. But in this case I don’t have a choice because of how my third party hosting is working with SimpleCast and DNS and such. I’m still going to use the naked domain, though, and I want it to “just work” so I’m 301 redirecting it to the www domain with this rule.
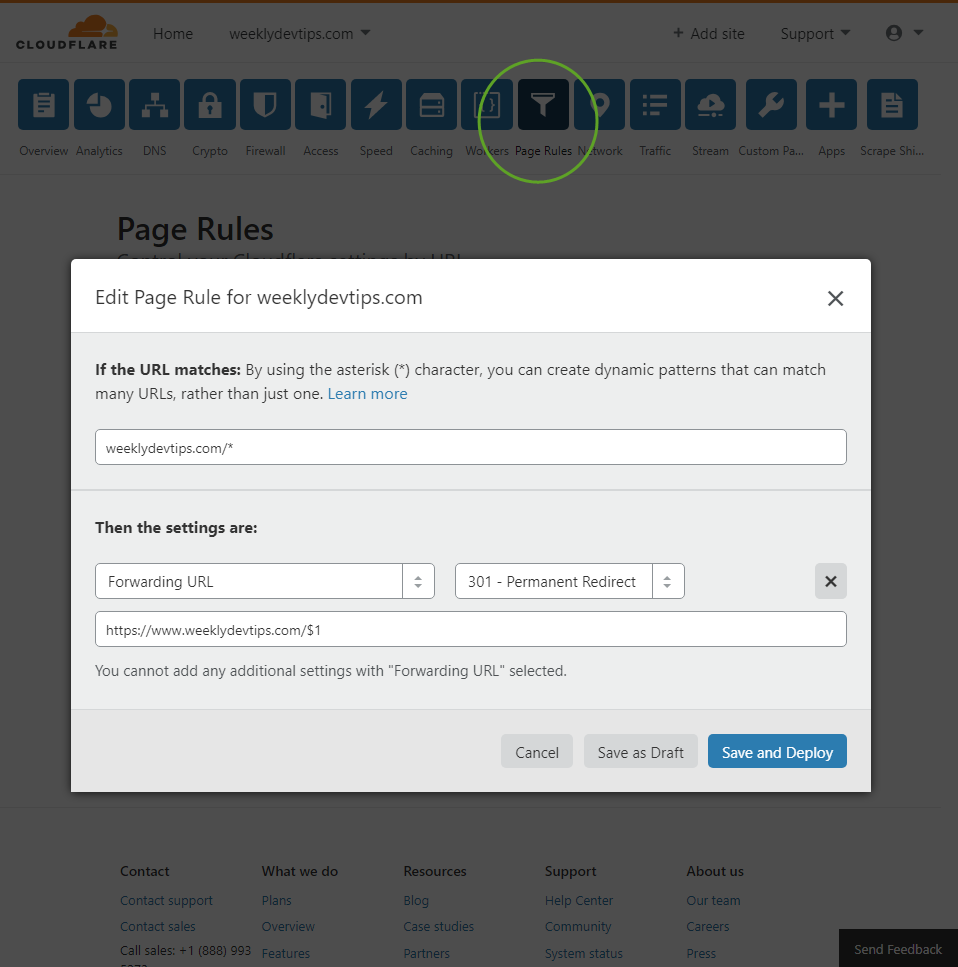
A 301 redirect is better than a 302 for SEO purposes.
And that’s it. Now when I go to weeklydevtips.com, it automatically goes to the correct web site, with HTTPS, by using Cloudflare’s free services.
Domain redirection and HTTPS works!
But wait, what about that certificate thingy I thought I needed?

The certificate is CloudFlare’s not mine, of course.
You’re getting encrypted traffic, but you’re not getting the trust benefits of having your very own, trusted certificate. You’re relying on trust in Cloudflare in this case. If you’re a bank or the next BitCoin you probably want more control over your security (and you can use your own custom certificates with Cloudflare’s paid plans). But if you’re a blogger or podcaster who just wants to follow current best practices for making the web more secure, you can probably go with Cloudflare’s free offering.
Caveats
There’s no such thing as a free lunch. It’s worth noting and knowing that the way Cloudflare works is as a proxy that sits in front of your server, does its thing (whatever services you’ve enabled, including SSL but they have others), and then sends traffic on to your server(s). If your server doesn’t support HTTPS and that’s why you’ve chosen to use Cloudflare, remember that traffic between Cloudflare’s servers and yours will still use HTTP, and thus will still be vulnerable to some kinds of attacks. Having HTTPS most of the way, including everywhere from the user’s browser to their WAP to their ISP to Cloudflare, is still way better than not having any of that traffic encrypted, but it’s obviously not the same as full HTTPS encryption all the way. **If you’re dealing with sensitive data, go with a full HTTPS approach if you can.**Another good option to look into for this is Let’s Encrypt, which lets you own the certificate used to protect your traffic.

About Ardalis
Software Architect
Steve is an experienced software architect and trainer, focusing on code quality and Domain-Driven Design with .NET.