Simple Branching and Merging with SVN
Date Published: 16 March 2010

It’s a good idea not to do too much work without checking something into source control. By “too much work” I mean typically on the order of a couple of hours at most, and certainly it’s a good practice to check in anything you have before you leave the office for the day. But what if your changes break the build (on the build server – you do have a build server don’t you?) or would cause problems for others on your team if they get the latest code? The solution with Subversion is branching and merging (incidentally, if you’re using Microsoft Visual Studio Team System, you can shelve your changes and share shelvesets with others, which accomplishes many of the same things as branching and merging, but is a bit simpler to do).
Getting Started
I’m going to assume you have Subversion installed along with the nearly ubiquitous client, TortoiseSVN. See my previous post on installing SVN server if you want to get it set up real quick (you can put it on your workstation/laptop just to learn how it works easily enough).
Overview
When you know you are going to be working on something that you won’t be able to check in quickly, it’s a good idea to start a branch. It’s also perfectly fine to create the branch after-the-fact (have you ever started something thinking it would be an hour and 4 hours later realized you were nowhere near done?). In any event, the first thing you need to do is create a branch. A branch is simply a copy of the current trunk (a typical subversion setup has root directories called trunk, tags, and branches – it’s a good idea to keep this and to put your branches in the branches folder). Once you have a new branch, you need to switch your working copy so that it is bound to your branch. As you work, you may want to merge in changes that are happening in the trunk to your branch, and ultimately when you are done you’ll want to merge your branch back into the trunk. When done, you can delete your branch (or not, but it may add clutter). To sum up:
- Create a new branch
- Switch your local working copy to the new branch
- Develop in the branch (commit changes, etc.)
- Merge changes from trunk into your branch
- Merge changes from branch into trunk
- Delete the branch
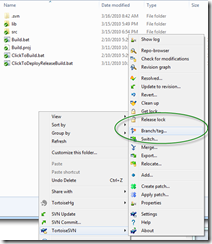
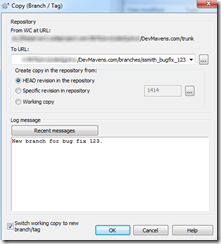
Create a new branch the root of your repository, right-click and select TortoiseSVN –> Branch/tag… as shown at right (click to enlarge). This will bring up the Copy (Branch / Tag) interface. By default the From WC at URL: should be pointing at the trunk of your repository. I recommend (after ensuring that you have the latest version) that you choose to make the copy from the HEAD revision in the repository (the first radio button). In the To URL: textbox, you should change the URL from /trunk to /branches/NAME_OF_BRANCH. You can name the branch anything you like, but it’s often useful to give it your name (if it’s just for your use) or some useful information (such as a datestamp or a bug/issue ID from that it relates to, or perhaps just the name of the feature you are adding.
When you’re done with that, enter in a log message for your new branch. If you want to immediately switch your local working copy to the new branch/tag, check the box at the bottom of the dialog (Switch working copy to new branch/tag). You can see an example at right.
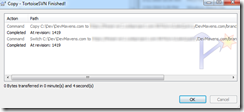
Assuming everything works, you should very quickly see a window telling you the Copy finished, like the one shown below:
Switch Local Working Copy to New Branch
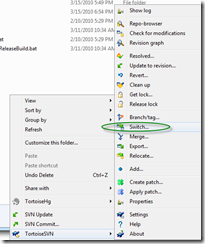
If you followed the instructions above and checked the box when you created your branch, you don’t need to do this step. However, if you have a branch that already exists and you would like to switch over to working on it, you can do so by using the Switch command. You’ll find it in the explorer context menu under TortoiseSVN –> Switch:
This brings up a dialog that shows you your current binding, and lets you enter in a new URL to switch to:
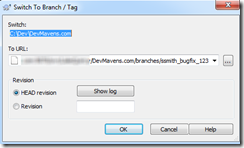
In the screenshot above, you can see that I’m currently bound to a branch, and so I could switch back to the trunk or to another branch. If you’re not sure what to enter here, you can click the […] next to the URL textbox to explore your repository and find the appropriate root URL to use. Also, the dropdown will show you URLs that might be a good fit (such as the trunk of the current repository).
Develop in the Branch
Once you have created a branch and switched your working copy to use it, you can make changes and Commit them as usual. Your commits are now going into the branch, so they won’t impact other users or the build server that are working off of the trunk (or their own branches). In theory you can keep on doing this forever, but practically it’s a good idea to periodically merge the trunk into your branch, and/or keep your branches short-lived and merge them back into the trunk before they get too far out of sync.
Merge Changes from Trunk into your Branch
Once you have been working in a branch for a little while, change to the trunk will have occurred that you’ll want to merge into your branch. It’s much safer and easier to integrate changes in small increments than to wait for weeks or months and then try to merge in two very different codebases. To perform the merge, simply go to the root of your branch working copy and right
click, select TortoiseSVN->Merge. You’ll be presented with this dialog:
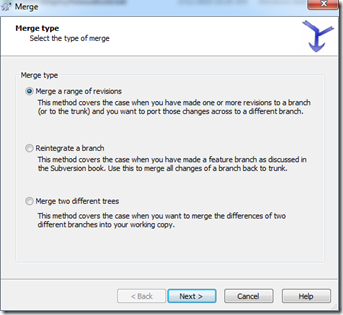
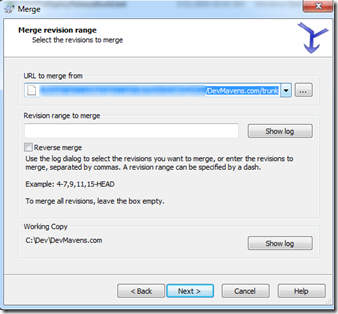
In this case you want to leave the default setting, Merge a range of revisions. Click Next. Now choose the URL to merge from. You should select the trunk of your current repository (which should be in the dropdownlist, or you can click the […] to browse your repository for the correct URL). You can leave everything else blank since you want to merge everything:
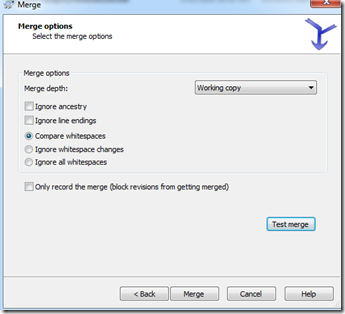
Click Next. Again you can leave the default settings. If you want to do something more granular than everything in the trunk, you can select a different Merge depth, to include merging just one item in the tree. You can also perform a Test merge to see what changes will take place before you click Merge (which is often a good idea). Here’s what the dialog should look like before you click Merge:
After clicking Merge (or Test merge) you should see a confirmation like this (it will say Test Only in the title if you click Test merge):
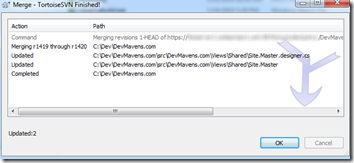
Now you should build your solution, run all of your tests, and verify that your branch still works the way it should, given the updates that you’ve just integrated from the trunk. Once everything works, Commit your changes, and then continue with your work on the branch. Note that until you commit, nothing has actually changed in your branch on the server. Other team members who may also be working in this branch won’t be impacted, etc. The Merge is purely a client-side operation until you perform a Commit.
In a more real-world scenario, you may have conflicts. When you do, you’ll be presented with a dialog like this one:
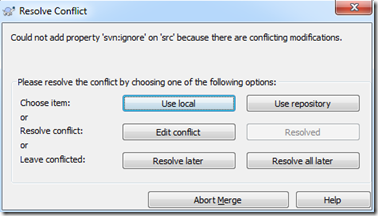
It’s up to you which option you want to go with. The more frequently you Merge, the fewer of these you’ll have to deal with. Also, be very sure that you’re merging the right folders together. If you try and merge your trunk with some subfolder in your branch’s structure, you’ll end up with all kinds of conflicts and problems. Fortunately, they’re only on your working copy (unless you commit them!) but if you see something like that, be sure to double check your URL and your local file location.
Merge Your Branch Back Into Trunk
When you’re done working in your branch, it’s time to pull it back into the trunk. The first thing you should do is follow the previous step’s instructions for merging the latest from the trunk into your branch. This lets you ensure that what you have in your branch works correctly with the current trunk. Once you’ve done that and committed your changes to your branch, you’re ready to proceed with this step.
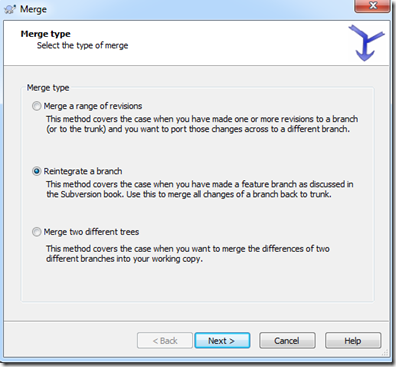
Once you’re confident your branch is good to go, you should go to its root folder and select TortoiseSVN->Merge (as above) from the explorer right-click menu. This time, select Reintegrate a branch as shown below:
Click Next.
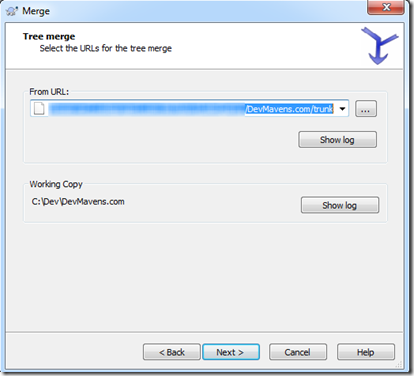
You’ll want it to merge with the trunk, which should be the default:
Click Next.
Leave the default settings:

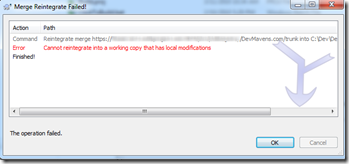
Click Test merge to see a test, and then if all looks good, click Merge. Note that if you haven’t checked in your working copy changes, you’ll see something like this:
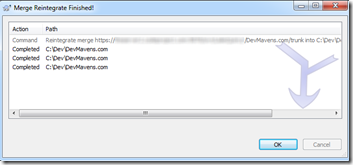
If on the other hand things are successful:
After this step, it’s likely you are finished working in your branch. Don’t forget to use the ToroiseSVN->Switch command to change your working copy back to the trunk.
Delete the Branch
You don’t have to delete the branch, but over time your branches area of your repository will get cluttered, and in any event if they’re not actively being worked on the branches are just taking up space and adding to later confusion. Keeping your branches limited to things you’re actively working on is simply a good habit to get into, just like making sure your codebase itself remains tidy and not filled with old commented out bits of code.
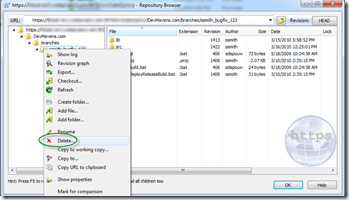
To delete the branch after you’re finished with it, the simplest thing to do is choose TortoiseSVN->Repo Browser. From there, assuming you did this from your branch, it should already be highlighted. In any event, navigate to your branch in the treeview on the left, and then right-click and select Delete.
Enter a log message if you’d like:
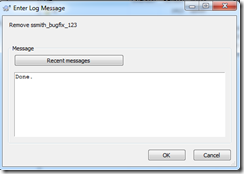
Click OK, and it’s gone. Don’t be too afraid of this, though. You can still get to the files by viewing the log for branches, and selecting a previous revision (anything before the delete action):
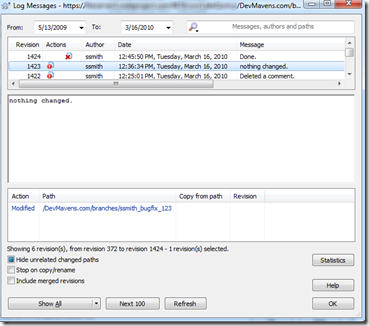
If for some reason you needed something that was previously in this branch, you could easily get back to any change set you checked in, so you should have absolutely no fear when it comes to deleting branches you’re done with.
Resources
If you’re using Eclipse, there’s a nice write-up of the steps required by Zach Cox that I found helpful here.
Tags - Browse all tags
Category - Browse all categories

About Ardalis
Software Architect
Steve is an experienced software architect and trainer, focusing on code quality and Domain-Driven Design with .NET.