How to Rip DVDs with Handbrake and AnyDVD
Date Published: 23 June 2020

I'm a big fan of Plex and have a lifetime subscription. If you're not familiar with it, it basically lets you have your own Netflix hosted on a computer in your house that you can watch from anywhere. If you've ever wanted to watch a movie or show that you already own, without having to deal with the discs, and it's not on one of your various streaming services, you understand the value. Also, if you have children, and they want to watch the same shows over and over but they never put the discs away (assuming you still have such things in your house, of course), this also solves that problem. I figure most new parents these days are just using streaming content from day one, but you never know. And if you are in the "we only stream" camp, and you've ever had some content you had access to suddenly disappear because the owner of the content decided they were getting a better deal from HuluflixPrime than NetBOGoMax then you understand how having your own private media server can be nice, too.
You can install these two things from their web sites, but I find Chocolatey to be much nicer. I have a list of some of my tools I've installed with Chocolatey here. To get started with ripping DVDs, you need handbrake and anydvd. Handbrake drives the process; anydvd works behind the scenes to decode the DVD so handbrake can read it. Handbrake is free; AnyDVD is free for 21 days then you need a license.
Install Handbrake
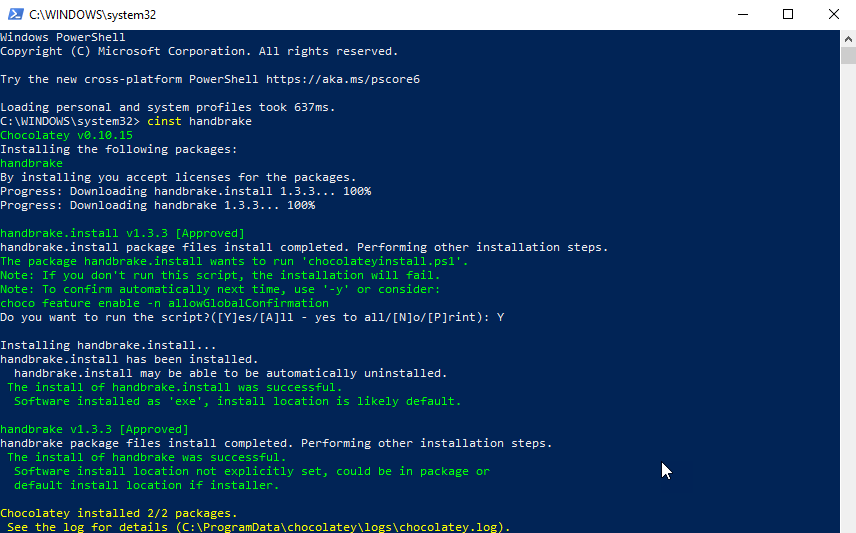
Just run this command to install handbrake from an administrator shell/command prompt:
cinst handbrakeYou should see something like this. Type in 'Y' when prompted.
Install AnyDVD
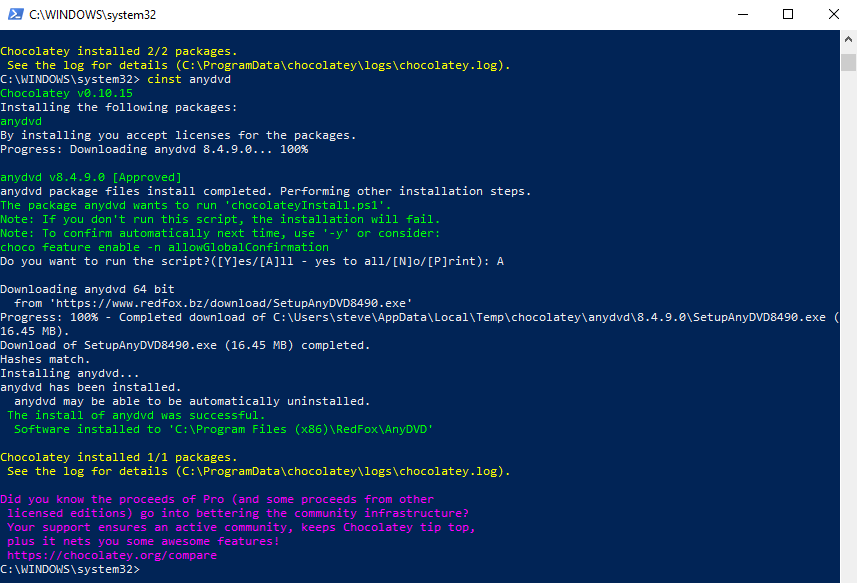
You install AnyDVD using the same process:
cinst anydvdType 'Y' when prompted. The output should look something like this (remember to use an administrator console window):
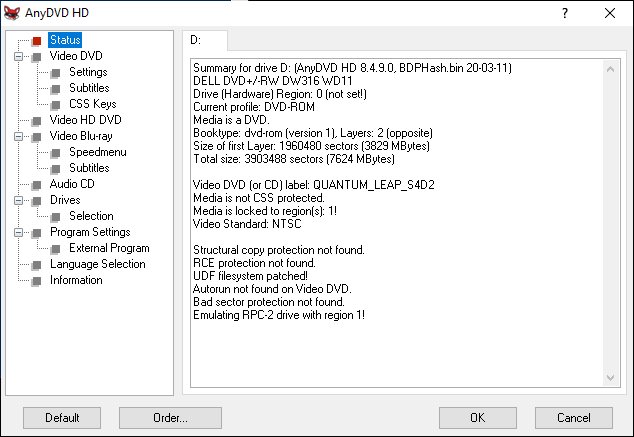
When AnyDVD finishes installing it should immediately run. You should see a window like this one:
It's probably a little late in the game to say this, but you really need a DVD player on your PC for this to work. If you don't have a built-in one, you can get an external one for pretty cheap and just plug it in via USB. I'm using this Dell drive (affiliate link) but there are cheaper ones available, too, if you don't care about name brand.
Yes, I'm ripping the show Quantum Leap, Season 4. My wife's a fan and we have the whole set but now the discs can sit safely in storage and we (she) can watch the shows from anywhere because Plex.
libdvdcss
You may also need to install libdvdcss. If so, this command worked for me:
choco install libdvdcss-2This might get you past errors like:
ibdvdread: Encrypted DVD support unavailable. libdvdread: Could not open input: libdvdread: Can't open E:\ for reading libdvdread: Device E:\ inaccessible, CSS authentication not available.
Running Handbrake
Now you're ready to start. Run Handbrake. You should see something like this.
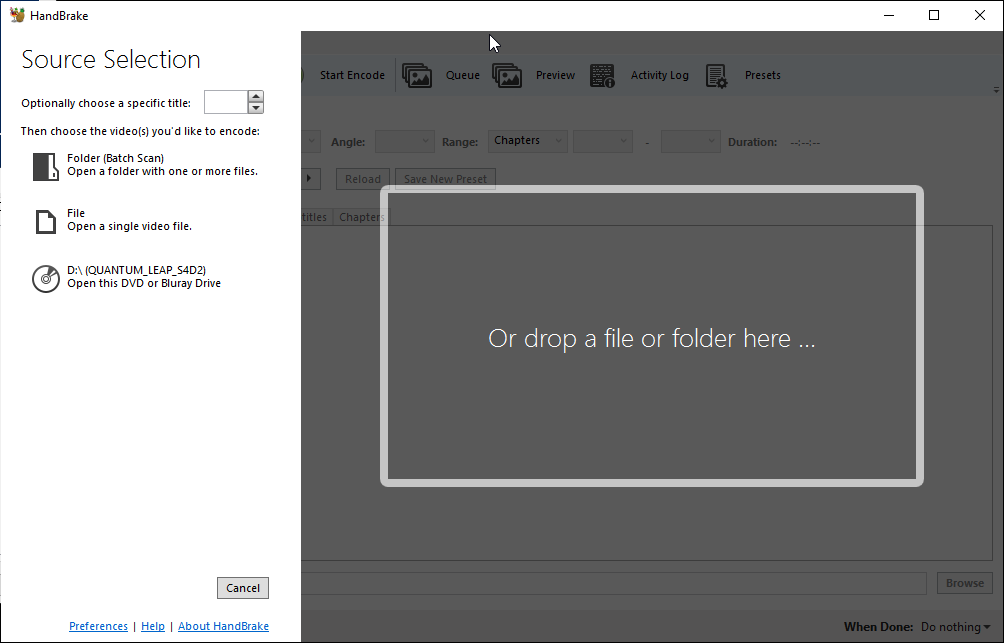
Choose the DVD drive which is typically the last option. If nothing is shown there, make sure you have a media DVD in the drive and that AnyDVD is running and has finished scanning the disc.
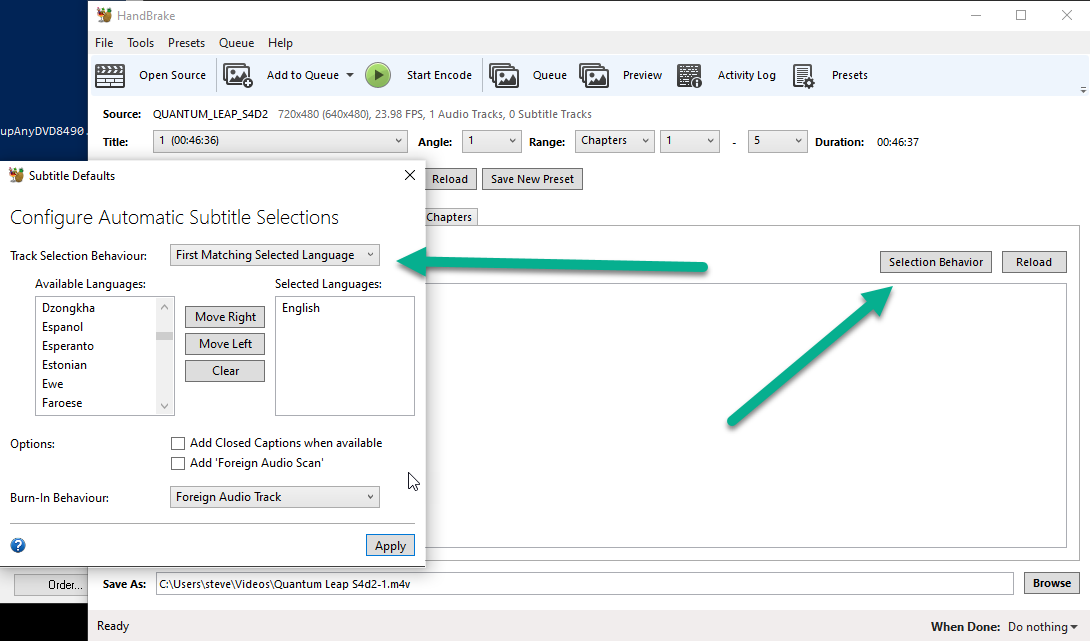
Next, if this is the first time you're running handbrake, there are a few preferences you need to set. You need to specify the default folder where you'll output files (assuming you want to use the Add All option I'm about to show, which is really nice for tv shows with a bunch of episodes per disc). You also should pick quality and default subtitle selection. Remember for standard DVDs there's no sense trying to get 1080p or 4k quality because it's just not there on the disc.
With subtitles, if you pick Default but not Burn In then you'll have the option of turning them on, but they won't always be there.
Once you've configured things the first time, you shouldn't need to do it again.
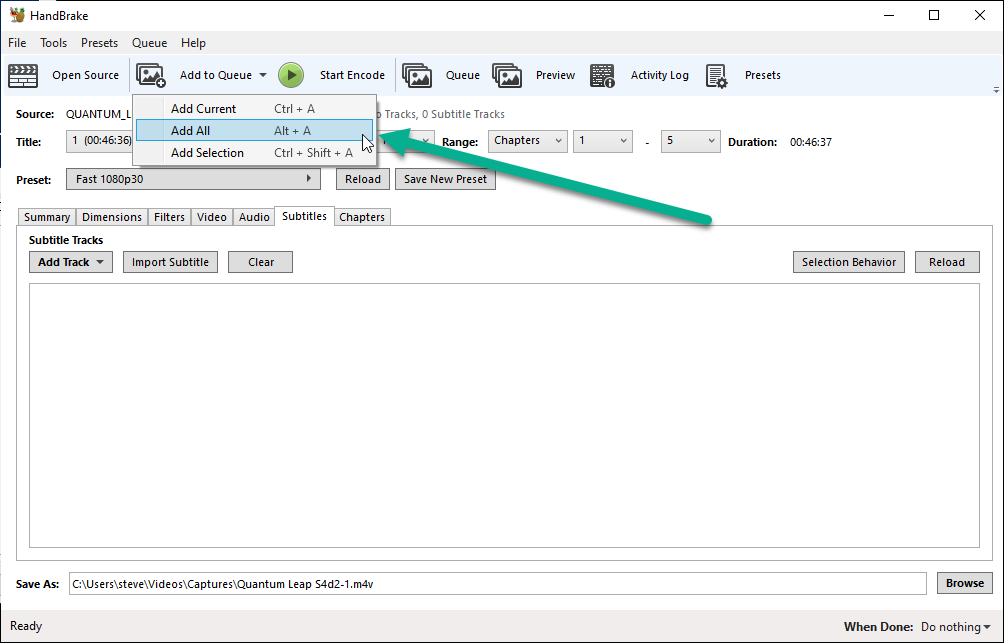
At this point you're ready to queue up the files you want to rip. If this were a movie, there would probably just be the one file, and Handbrake is pretty good at automatically selecting the right track based on length. In my example, there are 6 episodes of a TV show on the disc, so I'm going to queue them up so I don't have to manually mess with each one.
Now we're ready to go. Click Start Encode.
You can view the current status of the queue by clicking on Queue.
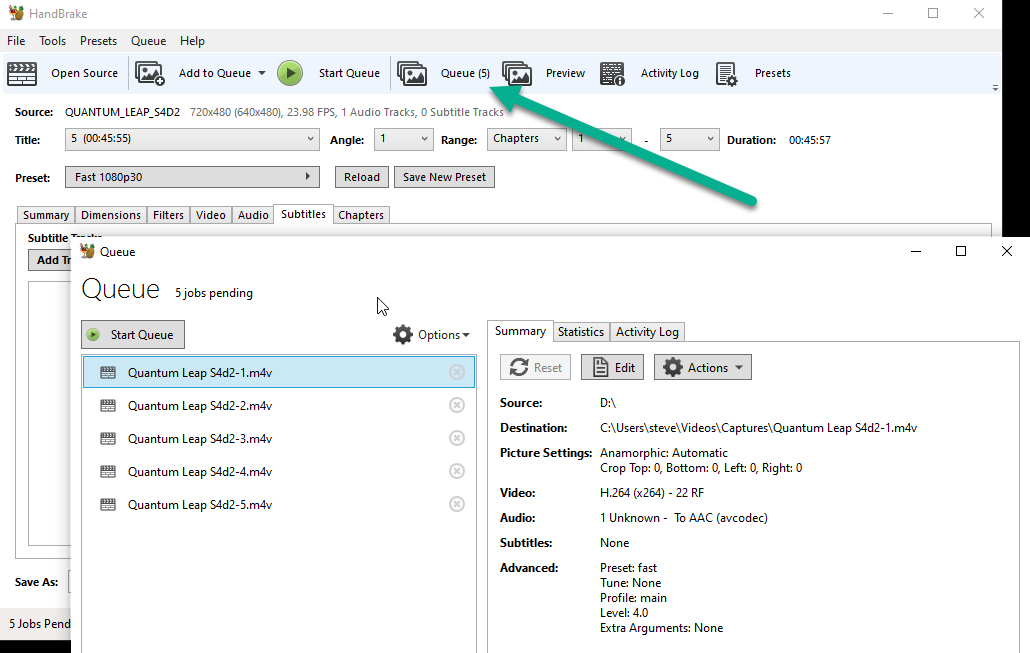
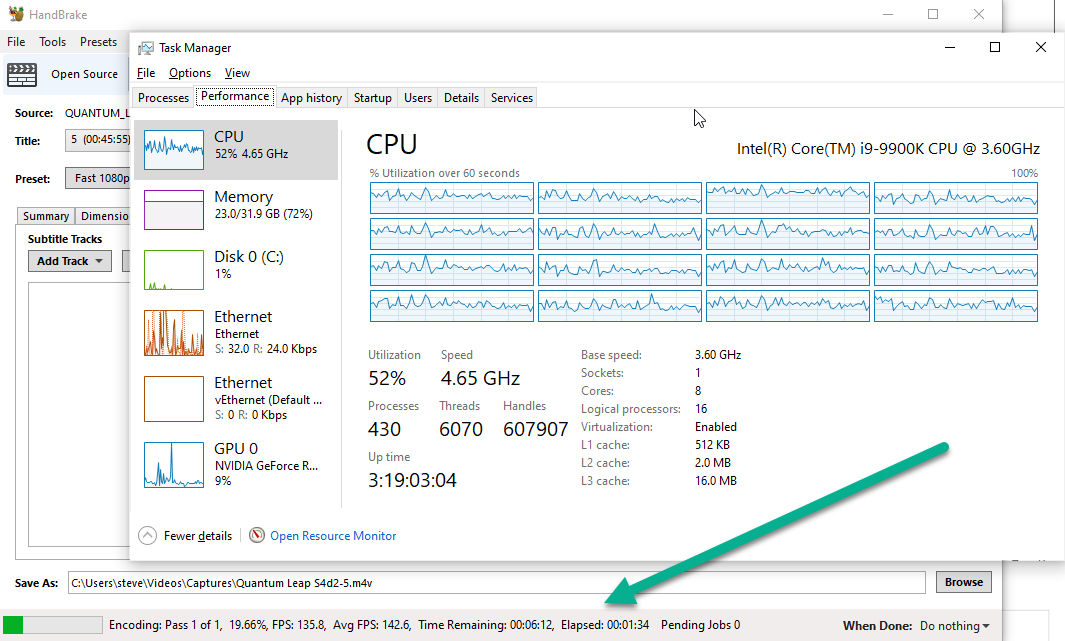
How long it takes to rip a particular movie or tv show episode depends on your CPU, DVD disc speed, and hard disk/SSD speed. In my case I think the limiting factor is the relatively cheap Dell DVD player I'm using. It's taking about 8 minutes per 45 minute episode:
Watching with Plex
Once the disc is finished, the last step is to modify the file names so they're in a format Plex prefers. You can try and get Handbrake to do this from the start but I've never had much success with that.

The fastest approach I've found is to open the destination folder and rename the first file. Copy the text of the file name without the extension (e.g. "Quantum Leap s04e01"). Then hit TAB to jump to the next file. Paste the filename and then hit backspace to change the episode number. Tab, Paste, Backspace, {number} until you're done.
Once you're done, move the files to your Plex server's folder path. I recently set up a NAS drive with Plex Server support, which I've been meaning to write an article about. When I do, I'll link to it from here.
Within a few moments, your Plex server should detect the new files (if you have it configured to do so), and you should see the movie/show appear in the Plex UI (this is the web UI):
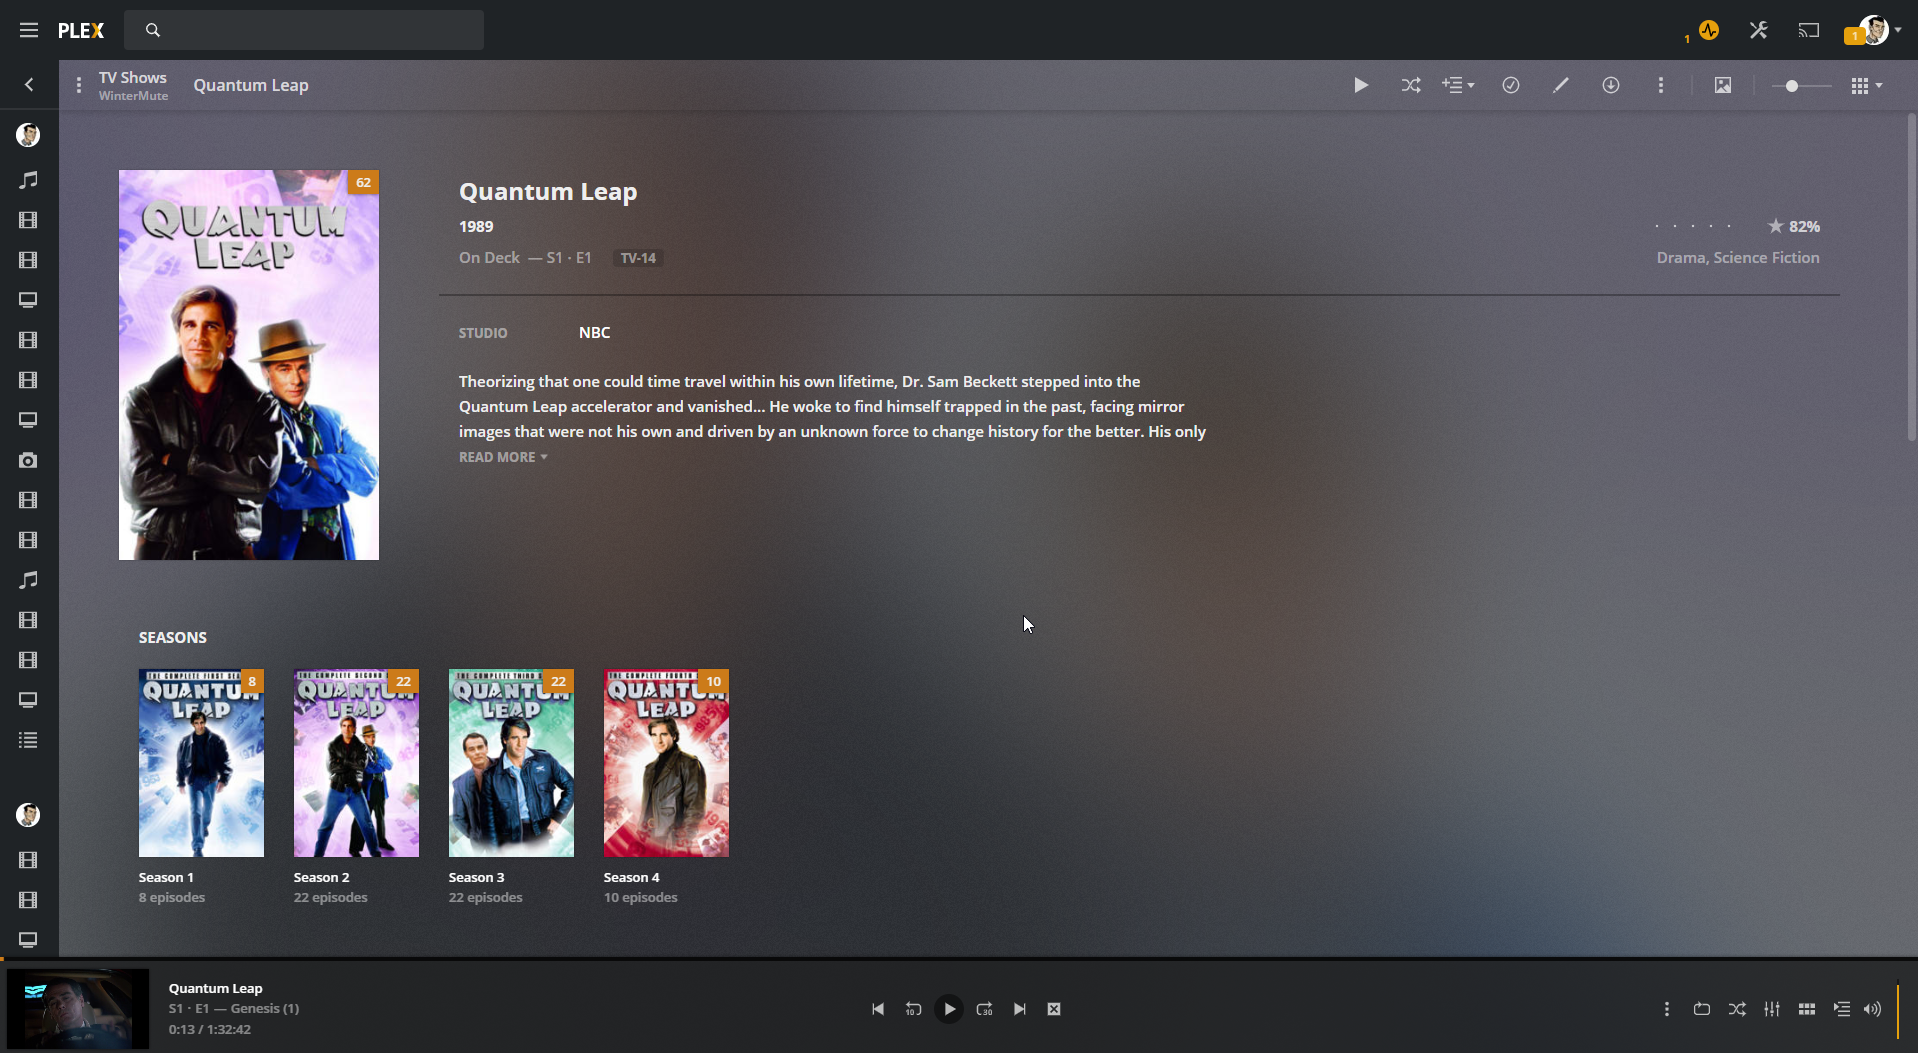
Note: You don't have to do anything to add the cover art, descriptions, etc. That all "just works" as long as you use filenames and folder structures that Plex prefers.
Summary
Ripping media you own provides a great backup, helps ensure the discs themselves aren't lost or destroyed, and can make it much more convenient to consume. It does take some time but it's easily done a few minutes at a time, and eventually you'll have your whole library available to you from any computer, phone, tablet, or smart TV. If you have any tips you'd like to share for how you've made this process easier, please leave a comment below. Thanks!
Category - Browse all categories

About Ardalis
Software Architect
Steve is an experienced software architect and trainer, focusing on code quality and Domain-Driven Design with .NET.