Moving a Site to Windows Azure in 5 Easy Steps
Date Published: 21 May 2013

One of my sites is currently having issues where it’s currently hosted. They’re resolved by restarting the application, but that’s gotten tedious and I simply don’t have time to invest in troubleshooting this particular site. And, oh hey, those MSDN Windows Azure benefits keep looking shiny like I should play with them. So, I figure I’ll try moving the site to Azure and see if miraculously that fixes the problem.
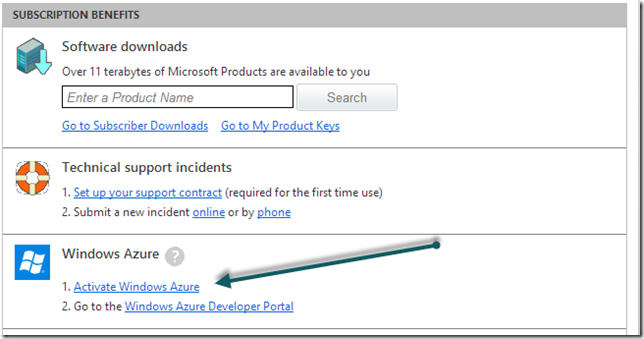
Step One: Activate Azure Benefit
Sign into your account with your MSDN Subscription, and click the Activate Windows Azure link:
Fill out the form, which will require a credit card and a mobile device (that can receive text messages) to complete.
Step Two: Connect to Azure Portal
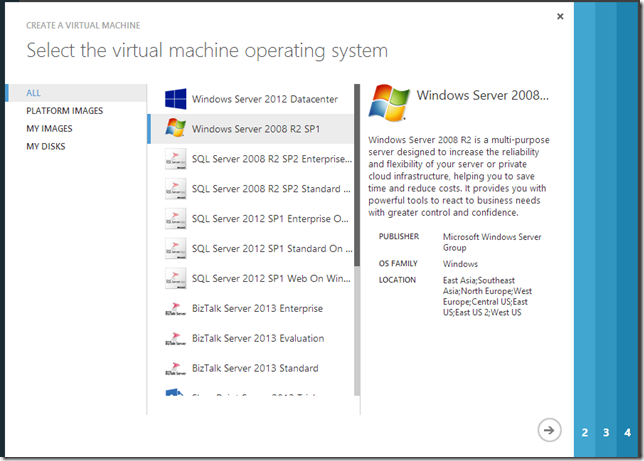
Follow one of the many links to https://manage.windowsazure.com (or just click on mine). There’s a ton of stuff you can configure and create from here. In my case, since I may want to host more than one small website, and I want to be able to use A records (I’m not a fan of www in front of domains for web sites, which is pretty much required for CNAME DNS approaches), I’m choosing to create a small VM (more on Azure DNS). You can do this from the NEW command in the bottom left, and if you use the gallery option you can select the OS you want – in my case I went with Windows Server 2008 R2 SP1.
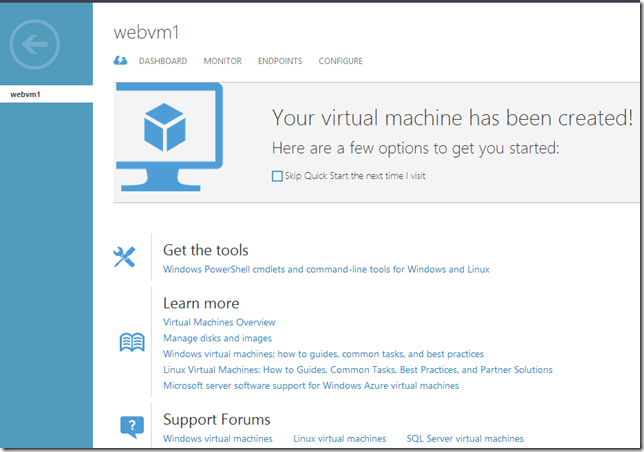
Once you complete this wizard, it takes a few (really surprisingly few – I remember how long it took to deploy apps to the original version of Azure, and this is way faster) minutes to deploy and start the VM. In a short while, you should see:
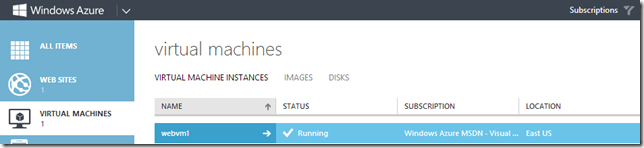
So now what? Click on your VM to see what you can do with it:
The next thing I want to do is remote into the machine and start setting things up.
Step Three: Connect to Virtual Machine
My first thought was to just try to connect to the public foo.cloudapp.net name my VM was given, but of course that didn’t work. Looking at your VM, navigate to the ENDPOINTS tab to see the public port configured for RemoteDesktop access. You’ll need to specify that in your Remote Desktop Connection in order to connect (you do this by adding it to the end of your computer’s name following a : (colon)):
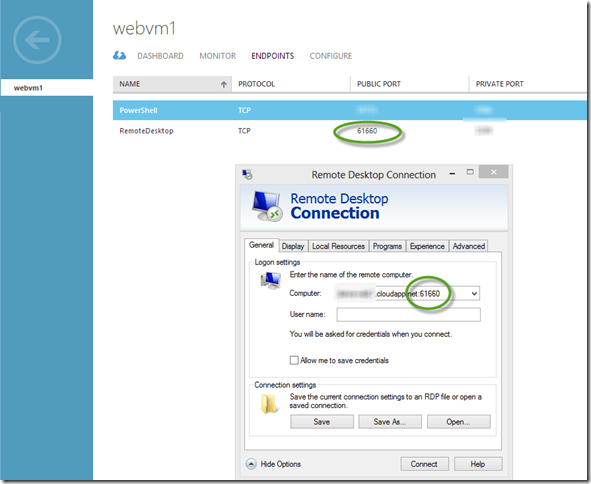
With that, you should be able to remote into the machine. In my case, since I want this VM to act as a web server, the first thing I need to do is Add Roles and select the Web Server (IIS) role. After that, the web platform installer is your friend. Once IIS is configured and I’ve gotten my web site’s files to the server, the next step is to configure the database.
Step Four: Configure Database
Your MSDN benefits include some database benefits in addition to the VM and web site benefits. Note that the database benefits are fairly limited, so if you have a lot of small databases you may use up this benefit quickly. With the Visual Studio Ultimate with MSDN benefit, you can use five 1GB web databases per month for free. To create a new database, go back to the Azure Management Portal, click on NEW, and choose SQL Database.
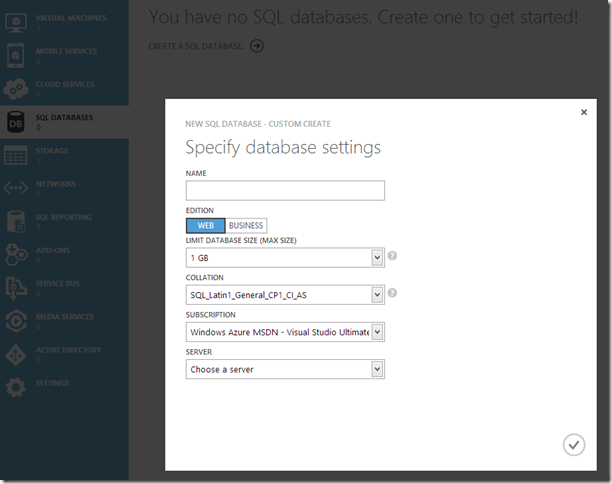
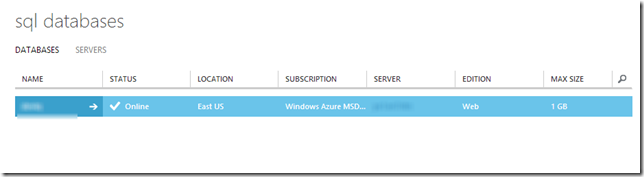
Choose a name, and a server (or a new one will be created if this is your first SQL Database). Then, if this is a new server, specify the username and password that will be used to connect to it. Once set up, which takes a few seconds, you should see the database:
So now, how do you connect to this database and move your existing data to it, is the next question…
Step Five: Connect to a SQL Database in Windows Azure
Click on the database name just like with the VM to see initial options:
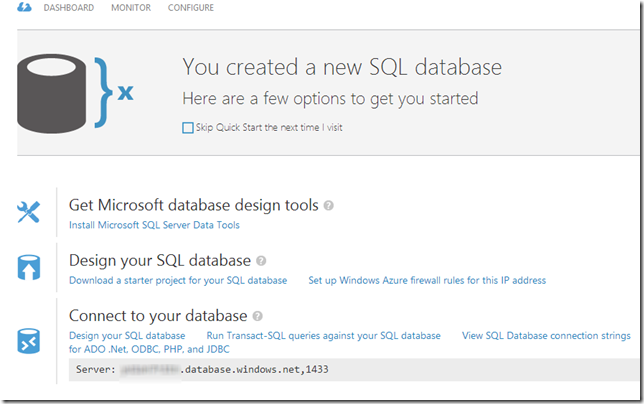
Now that you see the server info at the bottom, naturally the next step is to try and hit it with SQL Management Studio, but you’ll get this:
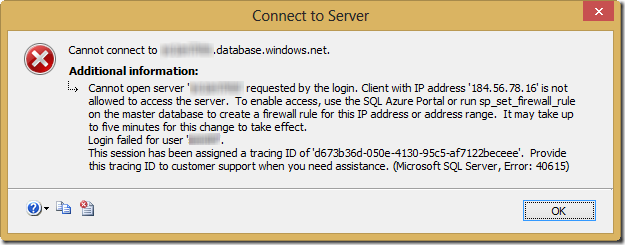
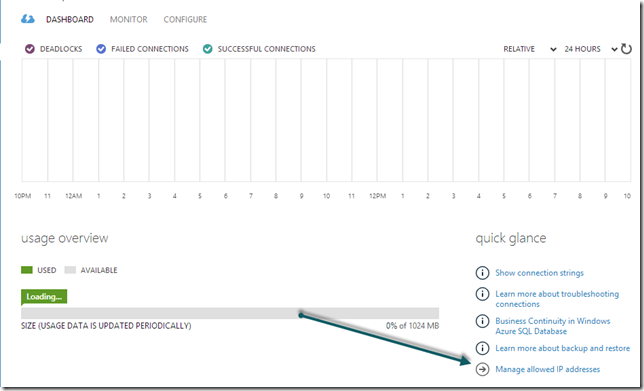
Security bites us again! Click on the DASHBOARD link to change which IP addresses are allowed to connect to the server:
It will help you out by suggesting your current client IP:
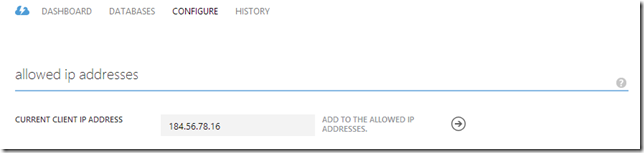
Be sure to click the SAVE link at the bottom after you add it.
Voila! Now you can connect from Management Studio, which will let you run whatever queries you need in order to get your data into the database.
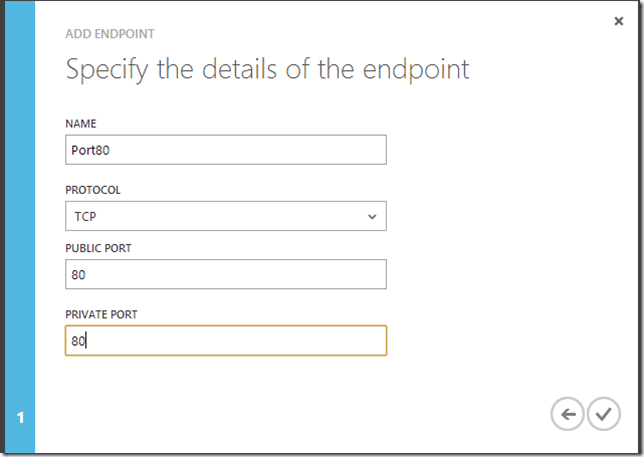
One last note – to actually connect to your web site on your VM, you’ll need to set up an endpoint for port 80 via the VM’s ENDPOINTS menu.
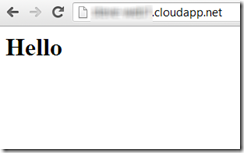
Once that’s in place, you should be able to hit your site in a browser:
Category - Browse all categories

About Ardalis
Software Architect
Steve is an experienced software architect and trainer, focusing on code quality and Domain-Driven Design with .NET.