How to Install Nerd Fonts and Icons in PowerShell 7 on Windows 11
Date Published: 22 July 2025

If you're setting up a polished dev terminal experience with icons, custom fonts, and PowerShell 7 on Windows 11, here's a step-by-step guide that actually works. We'll install a Nerd Font, configure PowerShell 7 properly, and enable terminal icons in directory listings — all without pulling your hair out. If video is more your thing, check out my YouTube video on prettying up your terminal with terminal icons.
🚫 What Not to Do
Before we dive in, here are a few things that didn’t work and might trip you up:
- ❌ Don’t use
Ctrl + Click +in Windows Terminal to open a new tab after install Powershell 7 — it likely opens PowerShell 5.1, not PowerShell 7. - ❌ Don’t assume
lswill show icons just because you installed a Nerd Font — PowerShell 7 uses a new formatting engine. - ❌ Don’t include
PS C:\Users\YourName>when pasting commands — only paste the command part.
✅ Step 1: Install PowerShell 7
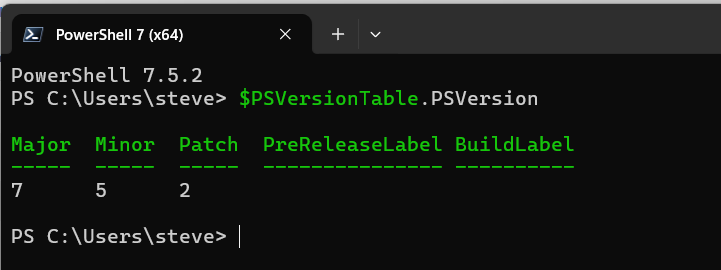
If you have a new Win11 OS, it most likely has PowerShell 5 running by default. You can check by running:
$PSVersionTable.PSVersionTry running Start>pwsh which should show something like this if you run the above command:
If it's not PowerShell 7, then install it by running:
winget install --id Microsoft.PowerShell --source wingetOnce installed, open PowerShell 7 by searching for "PowerShell 7" in the Start Menu or running pwsh. If you normally just open Windows Terminal, make sure your startup profile is configured to use Powershell, not Windows Powershell (which is v5).
✅ Step 2: Install a Nerd Font
You can grab fonts from the web site:
- Visit https://www.nerdfonts.com/font-downloads
- Download a font you like (e.g. JetBrainsMono, FiraCode, CascadiaCode)
- Extract the
.zipfile - Right-click the
.ttffiles and choose Install for all users
OR you can install them using PowerShell 7 (but not 5!):
Install-NerdFont -Name JetBrainsMonoThe install command, assuming it works, takes care of downloading and registering the fonts.
✅ Step 3: Set Windows Terminal to Use the Nerd Font
- Open Windows Terminal
- Click the down arrow → Settings
- Select your PowerShell 7 profile (probably just called Powershell)
- Under Appearance > Font face, enter:
JetBrainsMono Nerd Font(or your nerd font of choice)
- Save and restart the terminal (start - run - pwsh)
✅ Step 4: Install Terminal-Icons for ls Output
In PowerShell 7, run the following (in an admin prompt) to install and enable terminal icons in directory listings:
Set-ExecutionPolicy -Scope CurrentUser -ExecutionPolicy RemoteSigned -Force
Install-Module PowerShellGet -Force -AllowPrerelease
Import-Module PowerShellGet -Force
Install-PSResource -Name Terminal-Icons -TrustRepository -Force
Import-Module Terminal-Icons
Then test it - launch a new window using start - run - pwsh.
lsYou should now see icons for files and folders 🎉! Example:
![]()
✅ Step 5: Make It Stick with Your PowerShell Profile
To automatically load Terminal-Icons and start in your preferred folder every time PowerShell launches:
notepad $PROFILEAdd these lines at the bottom (change the Set-Location to wherever you'd prefer to start when a new powershell terminal opens):
Import-Module Terminal-Icons
Set-Location "C:\dev"
Save and restart your terminal.
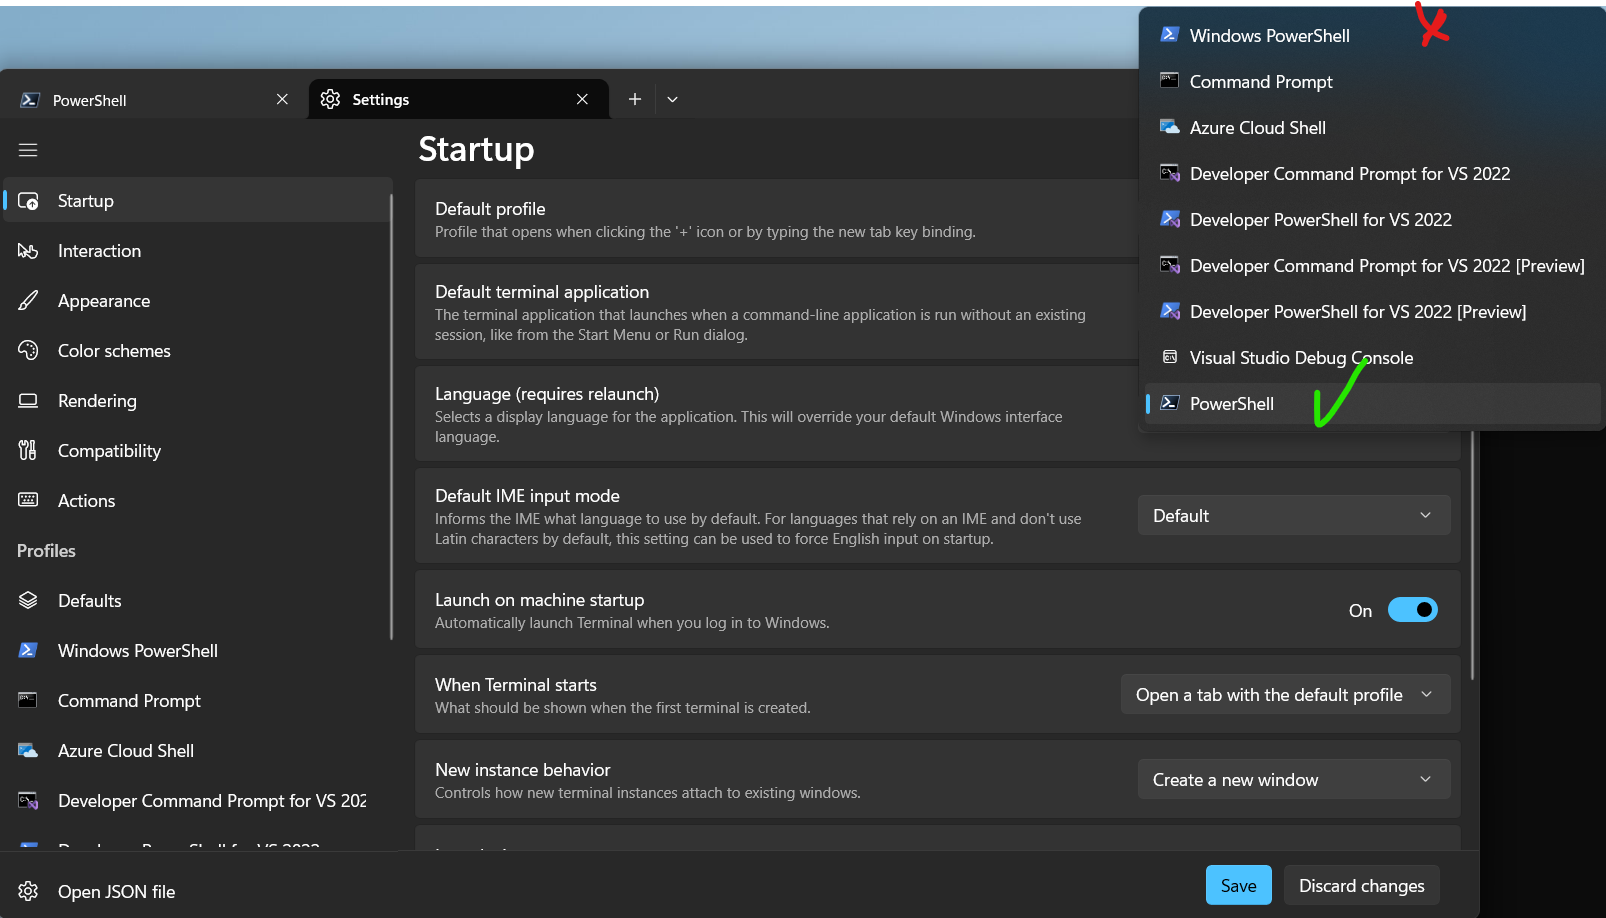
🧠 Bonus: Set PowerShell 7 as the Default Shell in Windows Terminal
If you didn't do this already, set up Windows Terminal so it default to PowerShell 7:
- Open Windows Terminal > Settings
- Go to the Startup section
- Set Default profile to PowerShell (which points to PowerShell 7)
✅ Done!
You now have a fully configured PowerShell 7 terminal with:
- ✅ Nerd Font rendering
- ✅ Icon-enhanced
lsoutput - ✅ A consistent working folder (
C:\dev) - ✅ Clean, modern developer vibes 😎
Let me know if you want to go further with Oh My Posh or Starship for a fully themed and functional prompt.
Resources
Category - Browse all categories

About Ardalis
Software Architect
Steve is an experienced software architect and trainer, focusing on code quality and Domain-Driven Design with .NET.