Flexible Deployments Using TeamCity
Date Published: 12 July 2016
I’m a big fan of JetBrains TeamCity for continuous integration (CI). It has a great web-based user interface, is extremely easy to set up and get running, and is also very flexible. What’s more, it’s free for up to 20 different build configurations, with multiple build agents (so your builds run in parallel). It’s an amazing deal and if you need more than 20 build configurations, you should be happy to give them your money for an upgrade.
In addition to standard builds, you can also use TeamCity as a tool for all sorts of automation activities. For example, building Nuget packages and deploying them. Or running periodic sanity checks against a production system. Or deployments to different environments. Let’s talk more about this.
Many organizations have multiple different environments in which they run their applications. The app may run on a developer’s local machine, in a separate, shared, development environment, a staging location, and finally in production. You may not want your CI build to automatically deploy to any of these, because it might interrupt someone in the middle of a test or other operation. This is a good example of where a TeamCity build might be configured for on-demand (and perhaps scheduled for off hours) use only, as opposed to triggering every time a change is pushed to source control. You could easily configure a project for your application, and then builds for each of the environments to which you deploy. It might look something like this:
MyCoolApp
- CI Build
- Deploy to Dev
- Deploy to Test
- Deploy to Stage
- Deploy to Prod
This will work, but there’s a lot of duplication involved. Assuming your deployment process is similar between at least some of the different environments, you’re going to need to update multiple builds if something changes. What’s more, if you’re at all worried about how many different build configurations you’re using, you’ve got 5 for just this one application. If you have a lot of applications, that can add up fast.
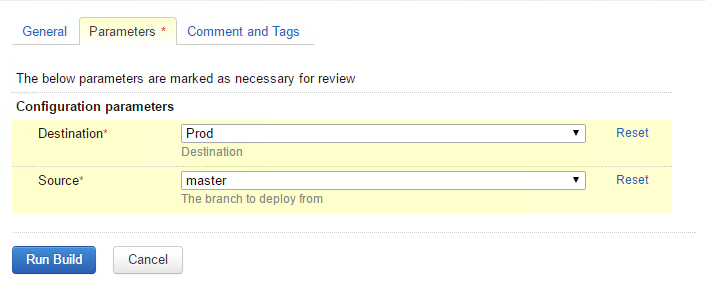
Fortunately, TeamCity builds support parameters. There are all kinds of environment and configuration parameters that you can leverage when setting up your build projects and tasks, but for on-demand builds like the deployments shown above, you can create a simple interactive UI for the user, allowing them to set certain parameters. For example, let’s say you want to be able to deploy from any given environment to any other environment. You can easily configure this to provide the user with this dialog:
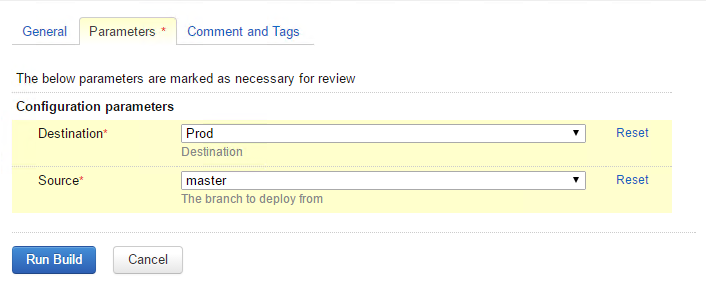
In this case, both the source and destination parameters are constrained by dropdown lists, but you can use checkboxes or textboxes if you prefer. To add parameters to a build configuration (or project), click on the Parameters option in the Build Configuration Settings.

From here, click Add a new parameter, and then click the Edit button next to Spec:

In order to have the parameter prompt the user for a value, you need to change the Display to Prompt. Your options for Type then include Checkbox, Password, Select (dropdownlist) and Text. The password option can be a useful way to provide some lightweight protection from carelessness, for instance to make sure someone really means to deploy to production. The dialog with Prompt and several items provided for a Select list might look like this:

Once you have the parameters you need, you can use them in your build tasks, including deployment scripts. TeamCity will even provide you with a helpful list of all of the available parameters, including your custom ones:

Now with parameters, the 4 different deploy builds can be reduced to a single build, driven by parameters. This helps us follow the Don’t Repeat Yourself principle in our build automation, and ultimately provides a more flexible solution.
Category - Browse all categories

About Ardalis
Software Architect
Steve is an experienced software architect and trainer, focusing on code quality and Domain-Driven Design with .NET.