4 Tips to Integrate TeamCity and GitHub
Date Published: 06 November 2016
Last updated: 13 October 2023
![]()
I've been a fan of JetBrains TeamCity for many years now. It's a great continuous integration / build server product, with an extremely responsive web-based user interface that's great to work with. What's more, the basic version supports up to 20 projects for FREE, which is tough to beat. However, like peanut butter and chocolate, TeamCity gets even better when combined with GitHub.

I'm also a big fan of GitHub. The workflow afforded by using pull requests, especially with the recent addition of reviews, is amazing. It's so easy to create an interactive conversation around a particular set of code changes, and to effortlessly integrate those changes into the main branch once they pass muster. But with the addition of a build server like TeamCity, you can also make sure that each one of these pull requests passes all of your build steps and tests before it is merged in, making it extremely unlikely that a change will break the main build (and thus impact other developers).
In this post I'll describe four things you can add to really make your TeamCity + GitHub experience shine.
1. Build Status Badge
One of the simplest ways to integrate your GitHub project with your TeamCity server is to display a build status icon or badge. This (and really all of these enhancements) requires that your build server is addressable from GitHub/the Internet. Setting this up is simple, and there's a (slightly outdated) blog post that goes into detail. Just add the following bit of HTML wherever you want the status icon to appear:
<a href="https://YOURTEAMCITYURL/viewType.html?buildTypeId=YOURBUILDID&guest=1">
<img src="https://YOURTEAMCITYURL/app/rest/builds/buildType:(id:YOURBUILDID)/statusIcon"/>
</a>
Be sure to replace the YOURTEAMCITYURL and YOURBUILDID strings with your actual server's URL and your Build configuration ID, found under general settings for a build configuration. It will be a string of the form "ProjectName_BuildName".
For a GitHub project, adding this to the README.md file is pretty customary. The result:
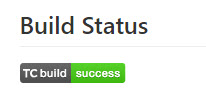
The icon is also a link to the build status page; remove the anchor element if you don't want it to link. For this to work, you'll need to either allow guest access to your server and build, or just check the box under Build options to "enable status widget" on the General Settings page for the build:

2. Web Hooks
Normally, TeamCity will poll whatever source control provider you've configured to check for changes periodically. The default is 60 seconds. This means that after you push a commit to GitHub, on average you'll need to wait 30 seconds before TeamCity will notice the change and kick off a build. That doesn't sound too bad, but remember that one of the reasons why Git is crushing SVN, TFS, and other source control systems is that things that take a few seconds on these other platforms are instant with Git. Waiting 30 seconds is an eternity. Fortunately, with web hooks, you can configure GitHub to notify TeamCity whenever a change occurs, virtually eliminating the need for this kind of polling. There's a fairly recent blog post that goes into the details, here, for TeamCity 10, which describes how to install a plugin to help with GitHub webhook integration. You'll want to install that plugin.
However, that's not the only step required. You also need to set up a GitHub Connection for your project. This is not the same as simply choosing to use GitHub as your source control system - it's a separate process that's described here. Essentially you need to register TeamCity as an OAuth application in GitHub for the appropriate GitHub project/organization. It's a good idea to create a TeamCity user and use its security access tokens for this process.
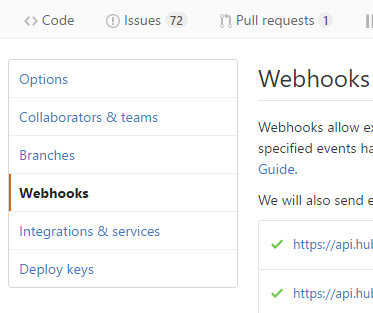
Part of this process also involves creating a Webhook for your GitHub project. You'll find those under your repository's settings, in the Webhooks section.
Once the connection is established, the plugin should start working, allowing you to easily install the required GitHub webhook (which involves setting some keys and URLs appropriately, but the plugin helps make this easy). With the web hook configured, you should be able to make updates to your project in GitHub and see builds triggered within a second or two on TeamCity.
3. Build per Pull Request
It's great that your build server watches your main or dev branch and fires off a build whenever someone pushes a commit there. But what about other branches? What about pull requests, before they're merged in? Well, TeamCity can do that, too, and it's pretty simple. It mostly comes down to one dialog box in your Version Control Settings called Branch specification. By default if you only want a TeamCity build configuration to monitor a single branch (e.g. "dev"), you'll set it up like this:
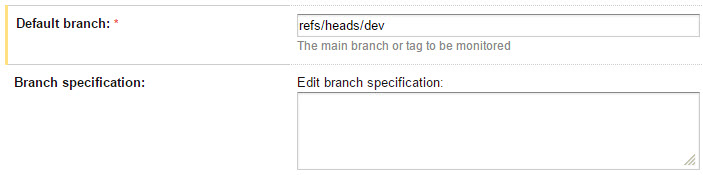
To set this up so that it will build other branches, you just need to specify the appropriate branch(es) in the Branch specification. My friend Hadi has a great write-up on this. Basically, if you want to run a build for every pull request as it would be when merged, you can use:
+:refs/pull/*/merge
This will run a build of the pull request merged with main branch - essentially the code as it will be when the PR is merged. If you want to run builds of both the PR by itself and what it will be once it's merged in, you can use:
+:refs/pull/(*/merge)
This is the option I prefer, as it will show any problems that exist either on the PR directly, or on the result of merging the PR. And in both cases, you'll know about these problems BEFORE you merge the pull request. Awesome! One thing you can't do currently is only build PRs and not the default branch. This is pretty easy to work around, though, by just providing a default branch that doesn't change frequently. Another blog post on this topic here.
You'll need one more plugin in order to report build status to GitHub. It's the TeamCity.GitHub plugin. You need to restart TeamCity once you upload the plugin. Be sure to tell JetBrains that you'd like to be able to do that without having to remote into your server. Once you have TeamCity reporting build status to GitHub, you can add required build checks to your Pull Requests (see below).
4. Build Checks on Pull Requests
Once you have TeamCity configured to report build status to GitHub, you'll see a build status on your branches, pull requests, and commits stating whether the build is pending, failed, or successful (shown typically as an icon). These build checks can be a great indicator for a reviewer about the state of the pull request or branch, but by default they're just informational - they don't enforce policy.
If you want to require that build checks be successful before a merge can be performed (via the GitHub merge button, not from the command line), you can configure your repository to require this. You'll find the option listed under your repository settings, under Branches. This is a feature of protected branches, described in GitHub help here. Choose a protected branch (or set one up if you haven't) and choose edit. If you have build status reporting configured, you will see a list of builds that have sent status information to this repository/branch in the past week. You can choose any/all of them to be required prior to allowing merging into the branch.

Summary
Continuous integration offers great benefits to software projects, as it dramatically reduces the feedback loop when problems are introduced that are detected by automated builds and tests. TeamCity is a great tool, and its integration with GitHub is really nice, too. Once you have all of this set up, which hopefully doesn't require much effort given the above information, I hope you'll find the process to be as helpful (and fun) as my clients have.
Troubleshooting Notes
If you find yourself having trouble authenticating with GitHub because the URL for your build server is incorrect, you should first make sure the URL is set properly under Administration - General Settings. However, GitHub will also remember the URL that you created when you set up a Connection for the project in question. Make sure this is an Internet-addressable URL, not a local intranet URL, so that you can authenticate with GitHub as needed while accessing the build server over the Internet. Here's more info on properly setting up a GitHub connection with a TeamCity project.

About Ardalis
Software Architect
Steve is an experienced software architect and trainer, focusing on code quality and Domain-Driven Design with .NET.